Enhanced Integrated Windows Authentication Support in Load Tester 4.2
Load Tester 4.2 offers a substantial number of enhancements over the 4.1 release. One of the last features, which was not available in the 4.2 beta cycle, is completely redesigned support for Connection Authentication Negotiation. For IIS users, just think of “Connection Authentication Negotiation” as support for IIS’ “Integrated Windows Authentication”. Load Tester’s CAN support is a bit more abstract to encompass other servers as well. In fact, the term “Connection Authentication Negotiation” is used to provide support for negotiation of an authentication scheme at the HTTP layer, which may be used to authenticate the browser’s connection to the server. For Load Tester 4.2, CAN supports NTLM and Negotiate using NTLM.
Let’s start by looking at a recording which uses NTLM. When we go to our server, we get a prompt for credentials from the browser instead of a web page, since the authentication is being performed at the HTTP layer.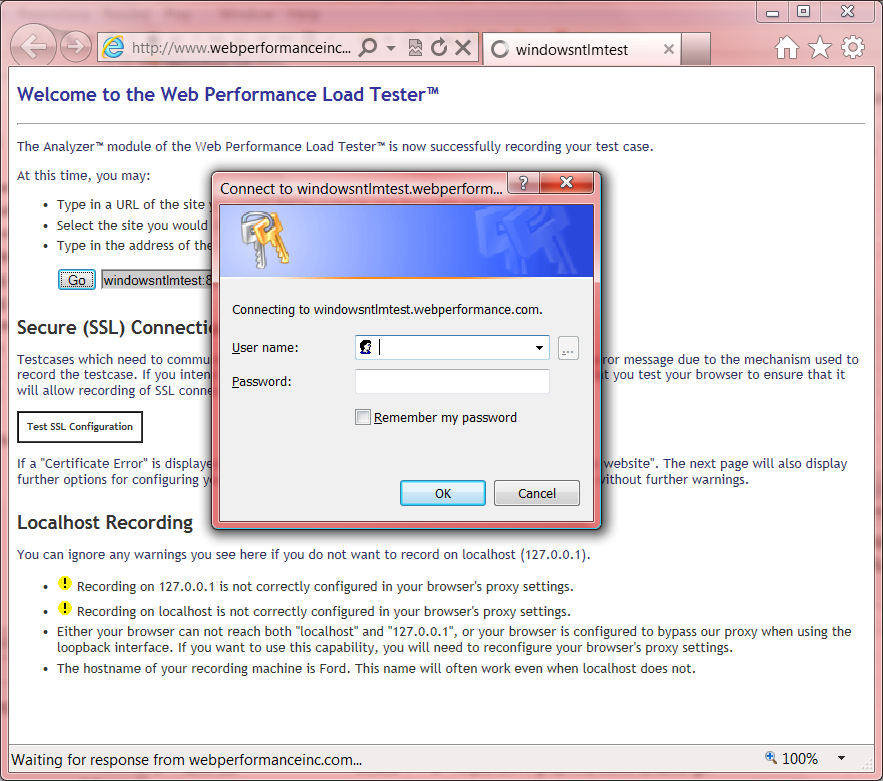
Note that for some sites, this prompt may not even appear at all (the browser may use your local account credentials or other cached credentials).
Once you enter your credentials and finish your recording, you will wind up with a testcase in Load Tester which looks something like this: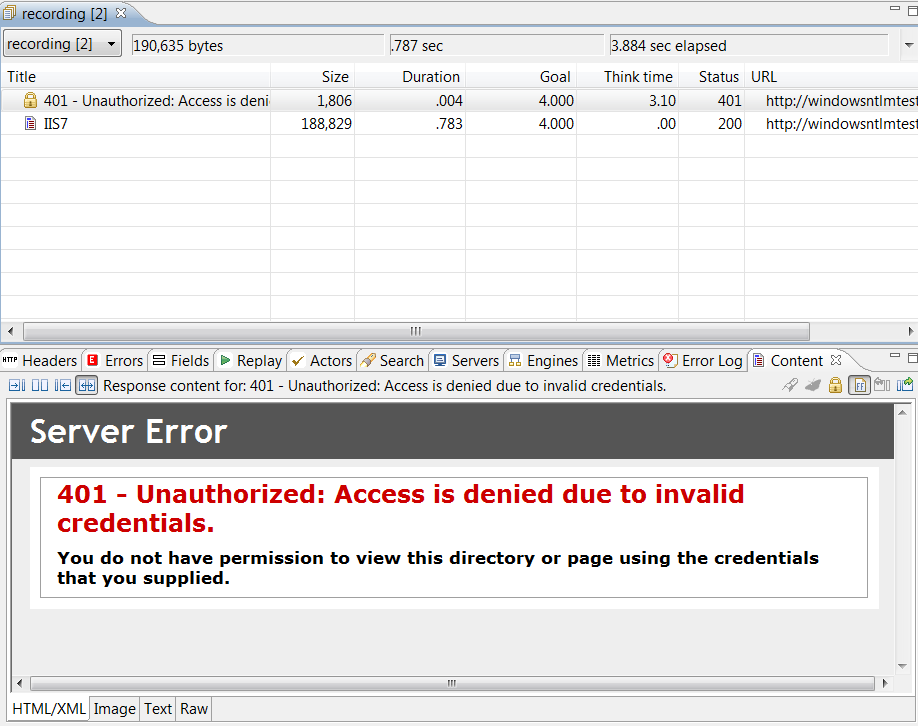
The “401 – Unauthorized” may look strange here, but it’s actually normal. This is how robots (such as Google) will see your page. When the server sends this page, the browser recognizes the HTTP headers as a request for credentials and displays the Username & Password pop-up instead.
For more information on what to expect when looking at a “raw” authenticated recording, see “How HTTP Authentication works and why load testers should care“.
Now that the recorder has recorded what actually happened, we want to configure the testcase to represent what we intend to happen: we request the home page, and authenticate if & when required. To get started, start the Testcase Configuration Wizard from the Wizard launch button.
Pressing one of the green play buttons to run a replay will cause the same wizard to be launched, since this testcase has not yet been configured for replay.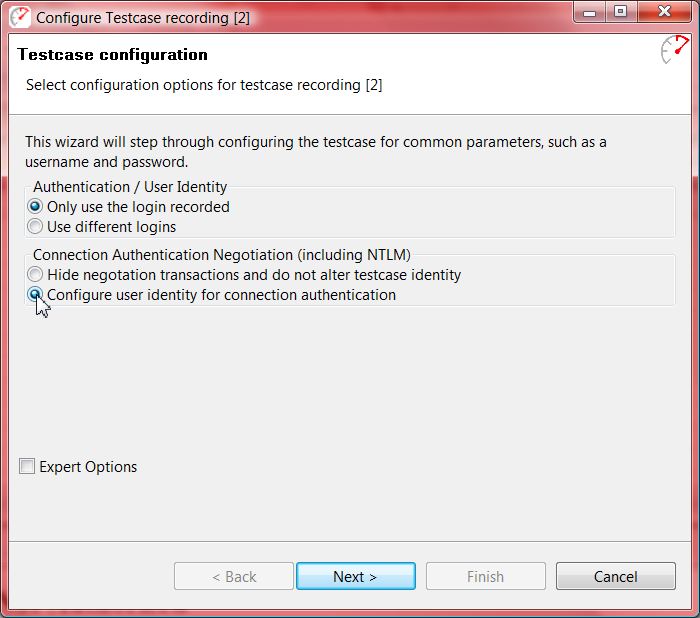
On this wizard, the “Configure user identity for connection authentication” is selected so we can enter user identities for virtual users to use when the server requires them to authenticate.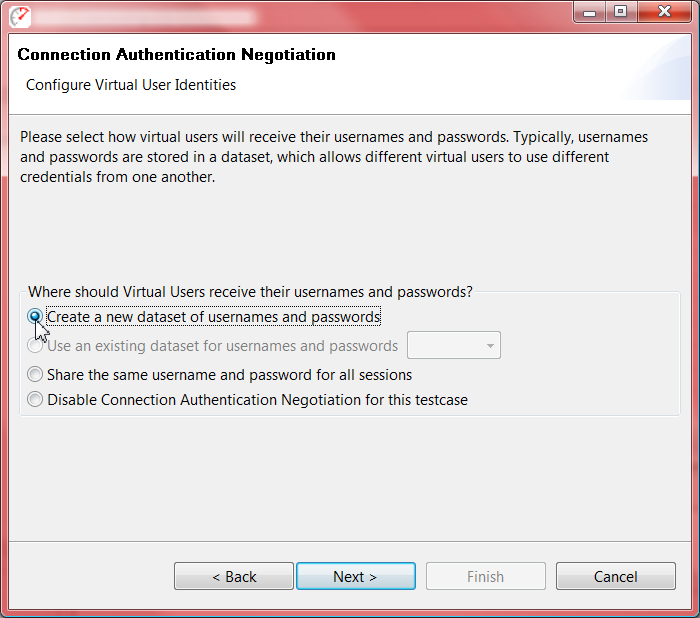
The next step allows us to define if the same credentials can be used for simultaneous sessions. There are a couple options:
- Use a dataset: For the purposes of this wizard, this can be thought of as a spreadsheet of usernames and passwords. This is recommended for most users, since many servers do not behave predictably with concurrent sessions using the same credentials.
- Share a username. This option may work for environments where access to the server hosting the application is restricted to some personnel, and the application is not aware of the environmental authentication. This option can also be used to configure the testcase for single-user replays with the intent of revisiting the wizard later before running load test.
Next, we just need to enter some user names, and press Finish.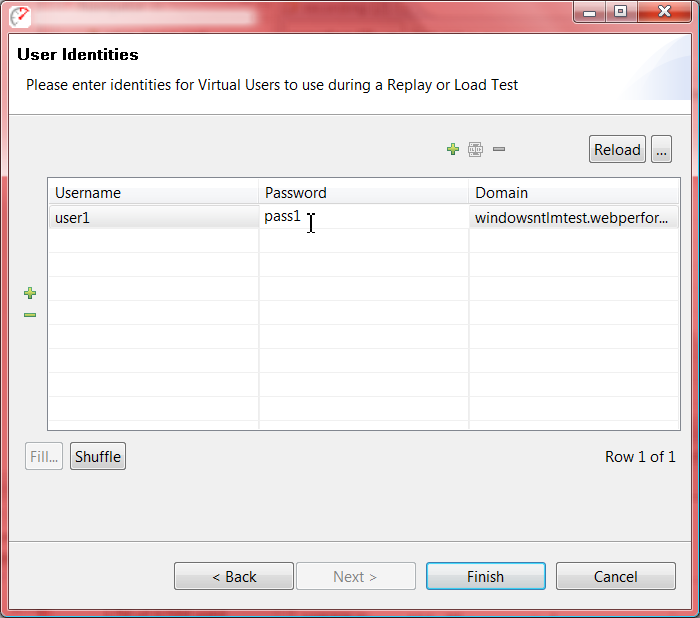
Now, the testcase editor shows just the pages that the browser showed during the recording, with the hidden pages returned by the server tucked away.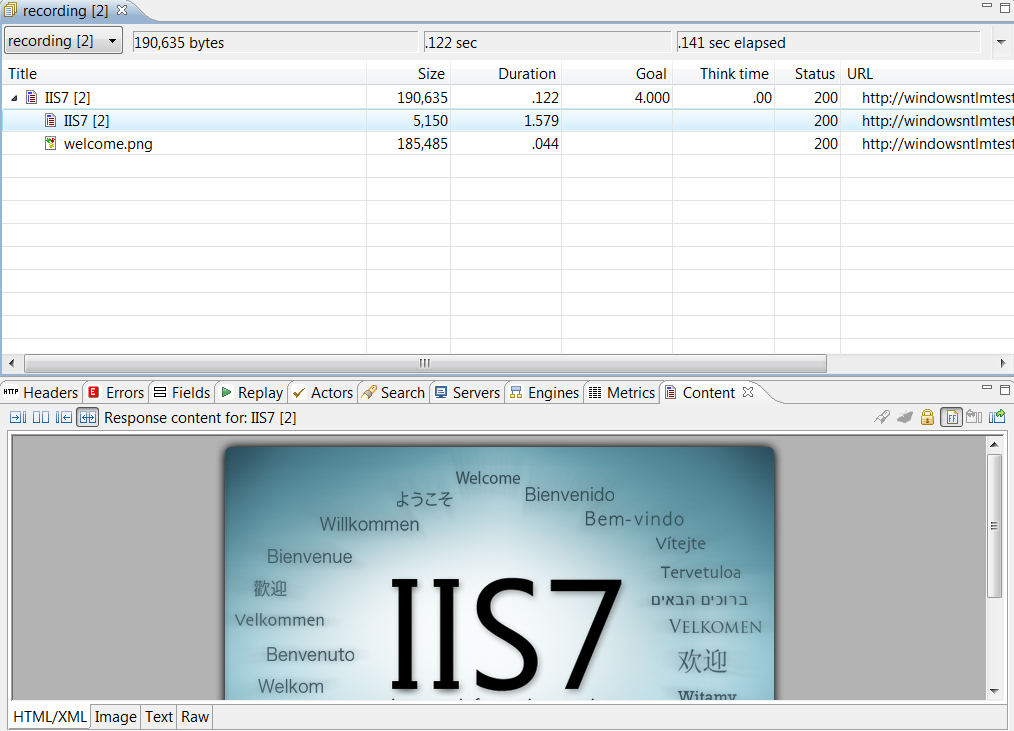
Of course, users who still want to see or diagnose authentication can still look up the same information in a couple of ways:
- From the Headers View
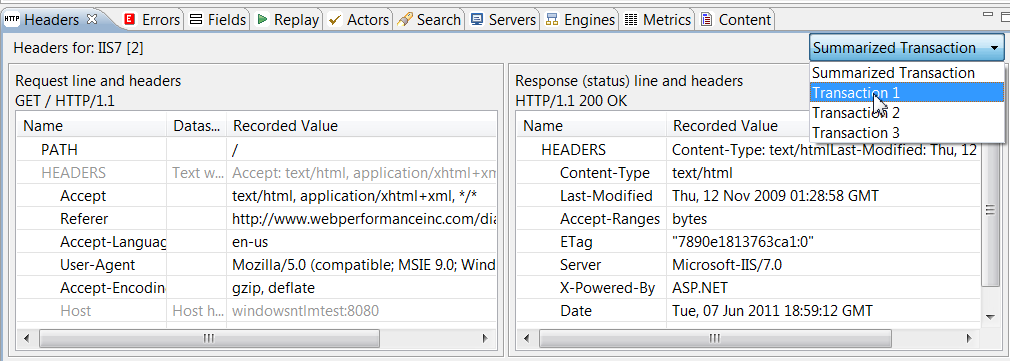
- Inside the testcase editor: enable the option to “show connection negotiation transactions” by opening the editor properties:

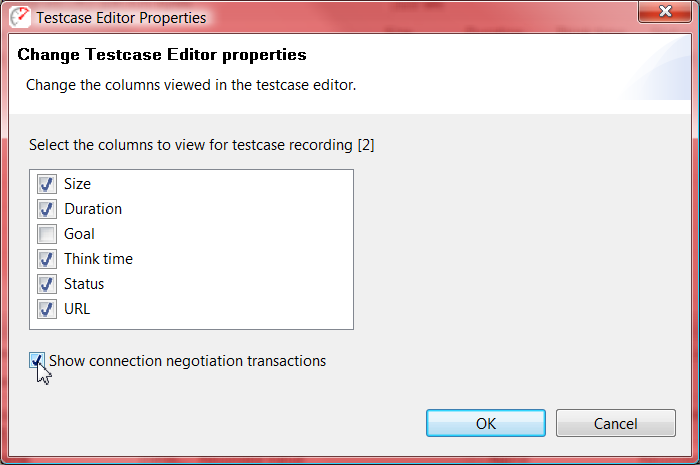
With this option enabled, the testcase editor will show the transactions that the browser either performs automatically or otherwise would hide as separate pieces necessary to complete a URL.
We hope that you will find that using connection authentication is much easier in Load Tester 4.2. Of course, if you have any questions, our friendly support staff will be more than happy to answer.
Happy Testing!
-Frank
Engineer at Web Performance
