Generating Load from Multiple Regions – Load Tester 6.6
Load Tester’s cloud load generation feature includes the ability to use datacenters located in different geographical regions.
This post contains detailed steps for adding an Amazon EC2 account and for running a new test configuration. These instructions apply to Web Performance Load Tester 6.6 and up. For Load Tester 6.5 and earlier, see Generating Load from Multiple Countries – Load Tester 6.5.
Why Load Test From Multiple Regions?
Generating load from different regions enables more realistic load tests. Rather than using just local datacenters, tests can simulate traffic from all over the world rather than just local datacenters.
This feature also allows testing of specific issues. Some users, for example, may expect uneven distribution of traffic from various countries. Others may want to test how application performance varies by region.
Configuring a Cloud Account
To add and configure a new cloud account:
1. Open a recording.
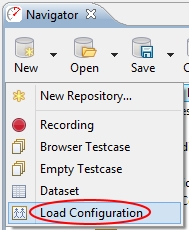
2. At the top of the navigator panel, select “New” -> “Load Configuration.”
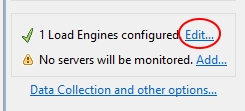
3. In the “New Load Configuration” pane, click the “Edit…” link that corresponds with the number of configured load engines.

4. In the “Configure Load Engine” menu, select the “Configure Cloud Accounts” option

then, in the “Cloud Accounts” menu, click “Add.”

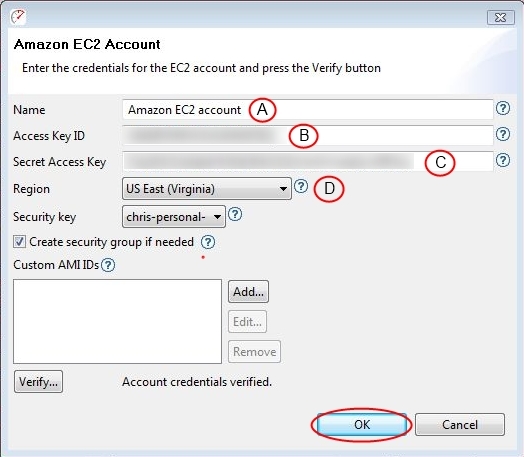
5. Enter a) an account name, b) your Access Key, c) Secret Access Key, and d) select a region, then click “OK”

- You may also add a security key. Security keys allow users to create multiple engines under one Amazon account. The engine view will only show engines created under this security key.
6. To add another region, select an existing entry and click “Duplicate.”
The “Cloud Account” menu will appear, populated with the previously entered account information. Change the name and region to distinguish new entries.
7. After adding cloud accounts, change the number of load engines you want to use by editing the “Total Engines” field, then save your configuration

- Change cloud engine distribution from the “Configure Load Engine Menu” by editing the numbers in the “Engines” column. You may also view information about or add more cloud engines by clicking on the “Engines” tab located in the inspection pane in the lower half of the Load Tester application.
8. Click ![]() to run a test using the new load configuration. A popup may appear confirming the launch of additional cloud engines.
to run a test using the new load configuration. A popup may appear confirming the launch of additional cloud engines.
NOTE: Startup procedures may take several minutes, and tests will run for the preset duration or until stopped.
Stopping a Load Test
Users have several options for terminating instances:
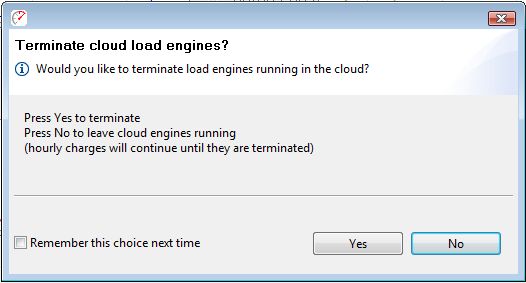
1. At the end of a test, Load Tester will generate pop-up will appear prompting the user to terminate cloud engines.
Click “Yes” to terminate any engines still running.
2. The “Cloud Accounts” menu contains an automatic idle time termination option.
This feature will terminate any instances that have idled for a set period of time. For example, if a user runs a ten-engine test, then runs a two-engine test, Load Tester will automatically terminate the remaining eight engines after the set timeout period.
3. To terminate cloud engines at any time, except when running a Load Test, select the “Engines” tab in the inspection pane located in the lower half of the Web Performance application.
4. Select the instance you would like to terminate.
5. Then, click “Remove.”
Additionally, when closing the application, you will receive a reminder popup if you have any instances still running.
When to Terminate Instances
Amazon rounds instance charges up to the hour. For example, If you configure a test to start one engine for 10 minutes and stop it, then repeats this process two more times for additional tests, Amazon will bill 3 instance hours.
To prevent unnecessary charges, consider how many tests you plan to run before terminating instances.
If you plan to run only one test, terminate all instances upon test completion.
If you plan to run several tests back-to-back, it’s beneficial to keep engines running until completing the final test of the day.
Future Updates
Cloud load may only be generated from regions containing Amazon datacenters. We will add more datacenters to Load Tester as Amazon makes them available.


